Thursday 16 January 2014

Birdcam - Powering the Pi.

In previous years my birdbox camera was just a USB webcam in the birdbox.  There was a modified network cable passed into the house, and thence on to the camera server (http://icamview.co.uk).  This worked pretty well, but was limited in what I could do with the images / video from the server.  - This was what spurred me to use a Raspberry Pi, and it's camera in the birdbox for this year. - The problem however was that when I put the Pi in the box, and powered the other end of the (10M long) USB cable, the voltage at the Pi was not sufficient for it to run in a stable manner.

The way I've addressed that is to use a 12volt supply in the house, and use a 12V->USB adaptor in the birdbox. - For the princely sum of £3 including postage, I got three of these cigar lighter adaptors:-


These supposedly provide 5V at 1A which should be more than enough for the Pi, with the camera, lights and network adaptor.  I modified the cigar lighter adaptor to take the input power feed with a wire and so there are no external connections.  Here it is in the birdbox.  As you can see it's pretty cramped in the 'camera' compartment of the box with the Pi, camera, power adaptor and leads.  The whole is held loosely in place with 'blu tak' which seems to work more than adequately.


The 12V power supply I took from a rubbish router which my ISP (TalkTalk) sent me.  I also replaced the 'network' cable with the rather over engineered cable you see here.

Anyway - lid back on the box, mounted back on the wall and has all been working fine since. - No birds yet though!

Saturday 11 January 2014

Birdcam progress... Slow, and some snags.

So - I've setup the model A with the camera, and am using 'motion' to capture images, video and to stream video to the web. - All pretty straightforward to setup thanks to an excellent example here - http://www.codeproject.com/Articles/665518/Raspberry-Pi-as-low-cost-HD-surveillance-camera

Video / jpgs etc are stored to a hard drive on another Rpi which works as my 'home server'.  I was a little worried about the wear on the SD card storing many, many pictures / videos locally, so this should make it last a little longer.  Once the Pi is in the birdbox, it cannot be touched from the time the birds nest to the time they've all left -  this can be something like February to June.

I addressed the focus issue by putting a lens from a (very) old camera in front of the Pi.  I believe this is something close to +4 dioptre lens.

OK - so I've got the software / hardware working pretty much as I want - time to put the whole lot in the bird box and see how it works.  The bird box is normally about 10ft up the wall outside - a long (network) cable with usb sockets each end runs through the wall and inside.  Originally this was running a USB webcam without too many issues, however each time I put the Pi at the end of this cable and powered it from inside I was getting issues. - The Pi would reboot, and the picture from the camera was very 'iffy'.  I think this is probably due to the voltage being too low on reaching the Pi through this long wire (and driving just with a phone charger.  I will need to address this, and have a plan to do so which I will document later.

The other problem was that the 'Pi Eye' single LED illuminator proved inadequate - here's a picture with the light turned on:-


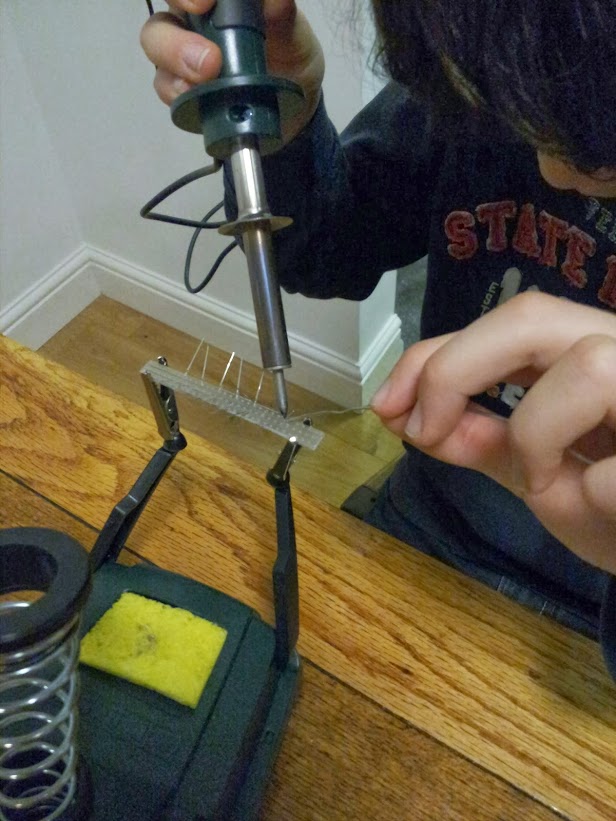
A quick search on ebay and £2 later produced a big bag of white LED's, and the ideal opportunity for the boy to use the soldering iron he got for Christmas..... A little testing showed that these  LED's draw about 20mA at 3.3v, and are very bright, but using several of them, and underdriving them through a 47ohm resistor seemed to give a good even light light and a current draw of about 8mA running 5 LED's in parallel.  This will mean a total draw of 16mA if I use two arrays of 5 LED's, which should be well within the current capabilities of the Rpi GPIO pins.  (I've found it difficult to find a reliable definition of how much current you can draw from the GPIO, but it certainly seems you should be as low as possible, and try to keep total current draw under about 20mA.

Here are the light clusters being made up by my trusty assistant.  Given he's very little experience soldering, there was no rework required and they worked first time.


One of the two finished illuminators.


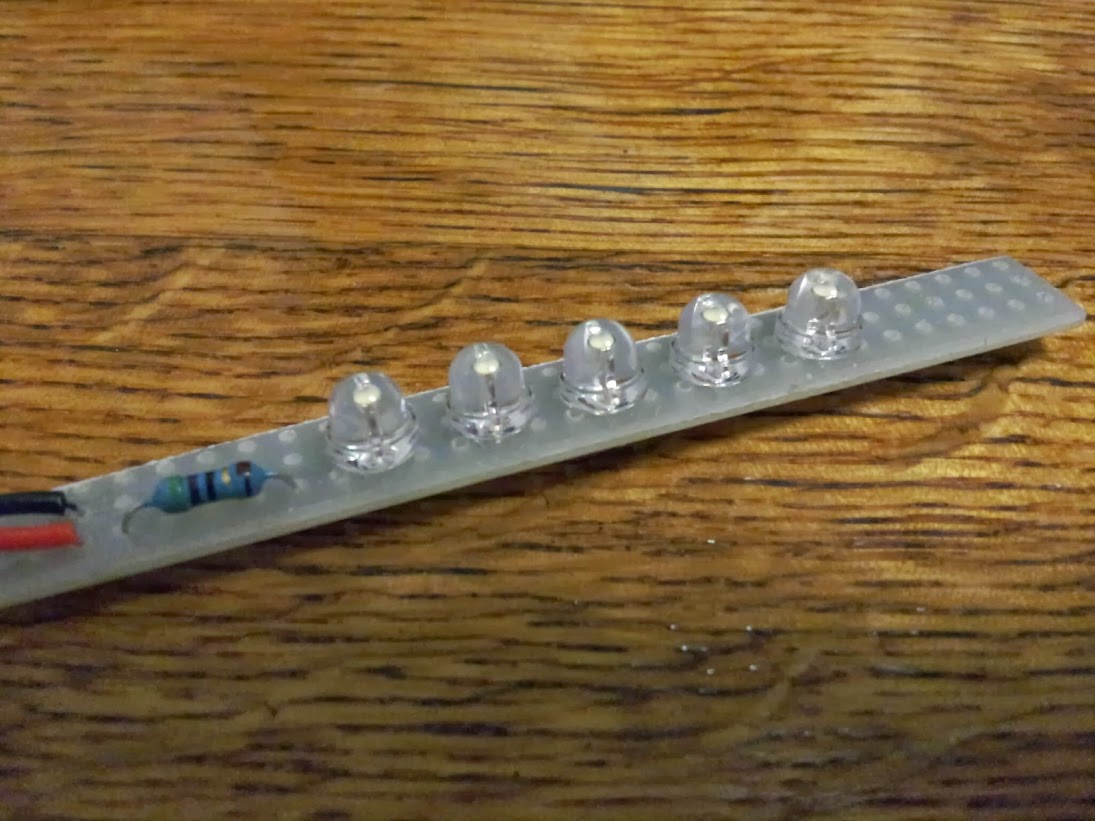
We wrapped the finished lights in heatshrink to insulate them, and then cut out a hole for the LED's. - All very satisfactory.  I connected these to GPIO's 17 and 18 so I can control the two lights independently.  I then modified the programs to control the lights so that I now have three settings DAY - both lights on, DUSK - one light on, and NIGHT - both lights off.  It will be simple to automate the turning on / off of the lights as required so as not to upset the birds.

Here's an example with one of the lights on:-


And here with both lights on:-


Definitely an improvement.  Focus isn't spot on, but should be close enough as can be seen in the images above.

The observant amongst you will note that these are not birds in the box, but in fact lego people - They are ideal for testing as they don't move much, and provide a good small target to assess colour and focus.

Next step is to address powering the Pi in the bird box, but I need to wait for another ebay delivery for that.

Birdcam / Raspberry Pi camera arrives.

OK - so my model A duly arrived with the Pi camera.  A little playing with this, and it's clear there are a few pluses and minuses with the camera.  The quality seems something like about the same as a lower end mobile phone camera in general.  This is what I see as the drawbacks / bonuses of the RPi camera over using a USB camera.

Positives:-
 - When bought with the model A, the price including delivery is just over £31. - This seems pretty reasonable to me compared with a cheap webcam and a model A Pi.

- Camera quality is OK - not brilliant, but not too bad.

- Data transfer doesn't impact on anything else you might be doing on the USB bus which seems to be a pretty major limitation otherwise - esp given I'm running a wireless dongle already on the USB.

- Using raspivid / raspistill doesn't seem to use very much CPU at all. - Same is not necessarily true using a USB camera.

Negatives:-
- Try as I might, I cannot shift the barrel holding the lens.  The lens / barrel are really, really small and I cannot apply more force without danger of breaking the camera off the board. - This means I cannot adjust the native focus of the camera which is fixed.  It seems to be rather long sighted, focusing best from about a metre to infinity.  Not a major issue, but I need focal distance of about 25cm, so need to use a corrective lens.

- Ribbon cable isn't very long, and isn't very flexible - It would be nicer to have a flexible cable.

- IR ability with the standard camera is nil. - Generally, even cheap webcams have some built in IR ability for night / low light ability.  I know there is the model available with the IR filter removed, but it means I can't use the standard version in the birdcam at night.  Further, a cheap USB camera generally has built in IR leds for low light use. - There is no illumination with the Pi Camera module.


Saturday 4 January 2014

(Birdcam) Controlling LED on PiEye case. - Controlling the PiEye camera light.

I'm still waiting for my Pi Camera, and an model A to install a birdbox camera project.  In the meantime, I'm mpreparing the other bits.  Today, my PiEye case came in the post - this has a built in white LED.  What I'd like to do is turn on the white LED during daytime to help the visibility / colour rendition of the picture, and turn it off at night.  I'll add an IR LED to illuminate during the nighttime too.

Install Raspian from Noobs.
Install wifi and get setup for headless.
Enable ssh.
sudo apt-get install git-core (already latest version)
pi@camerapi ~/light $ cd wiringPi/
pi@camerapi ~/light/wiringPi $ git pull origin
./build - This builds and installs the wiringPi library.  All OK.
Now, gcc -o blink ./blink.c -lwiringPi - this builds OK.

/*
 * blink.c:
 *      blinks the first LED
 *      Gordon Henderson, projects@drogon.net
 */

#include <stdio.h>
#include <wiringPi.h>

int main (void)
{
  printf ("Raspberry Pi blink\n") ;

  if (wiringPiSetup () == -1)
    return 1 ;

  pinMode (0, OUTPUT) ;         // aka BCM_GPIO pin 17

  for (;;)
  {
    digitalWrite (0, 1) ;       // On
    delay (500) ;               // mS
    digitalWrite (0, 0) ;       // Off
    delay (500) ;
  }
  return 0 ;
}
My Pi Eye LED is connected between pins 1 and pin 11 (gnd and gpio17 on the header on the PI.
Running sudo ./blink blinks the LED - great.  This confirms I can make this work from software.
So - even I can hack this to make an on and off routine.
/*
 * on.c:
 *      turns on LED on pin 11 (gpio 17)
 */

#include <stdio.h>
#include <wiringPi.h>

int main (void)
{
  printf ("Pi Eye LED on\n") ;

  if (wiringPiSetup () == -1)
    return 1 ;

  pinMode (0, OUTPUT) ;         // aka BCM_GPIO pin 17

  digitalWrite (0, 1) ;       // On
  return 0 ;
}

And Off.
/*
 * off.c:
 *      turns on LED off pin 11 (gpio 17)
 */

#include <stdio.h>
#include <wiringPi.h>

int main (void)
{
  printf ("Pi Eye LED off\n") ;

  if (wiringPiSetup () == -1)
    return 1 ;

  pinMode (0, OUTPUT) ;         // aka BCM_GPIO pin 17

  digitalWrite (0, 0) ;       // On
  return 0 ;
}


Cool - that was easy!